[afwc_registration_form]
Category: 未分类
How to control two WeMacro rail in MacOS
First,please make sure that all control boxes are plugged in and switched off. There is no USB cable connected to any of the control boxes at this time.
Then switch on one of the control box switches and connect it without the USB cable. Open the MacOS program of WeMacro and select the Bluetooth connection method, select the “HC-08” device in the program and click on Connect.

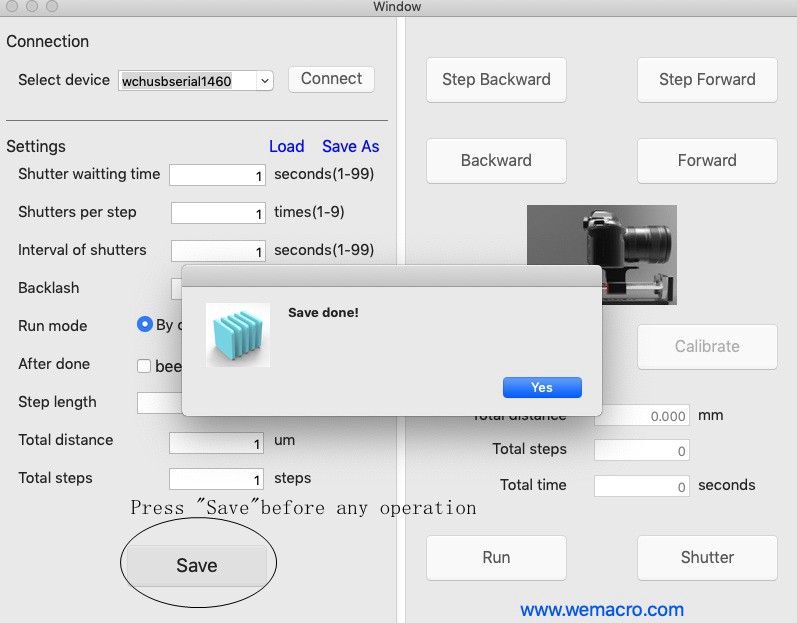
Press“Save”and control the first rail to move or take picture.
Then power on the second controller and connect this controller to the Mac computer using the USB cable.
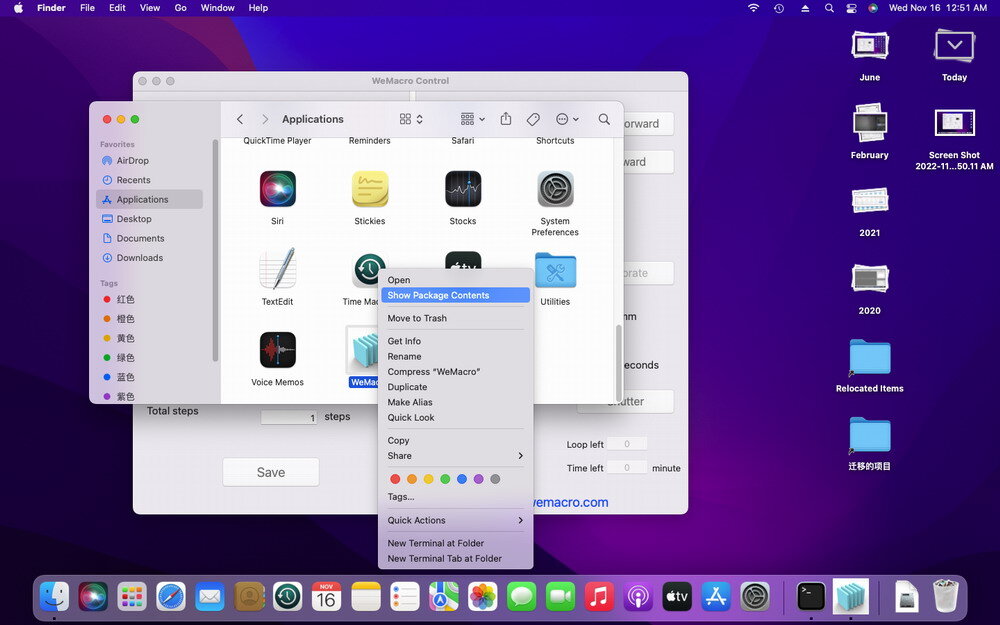
Then go through the “Finder”, find “Application”, find WeMacro and right click on it. Click on “Show package content”.
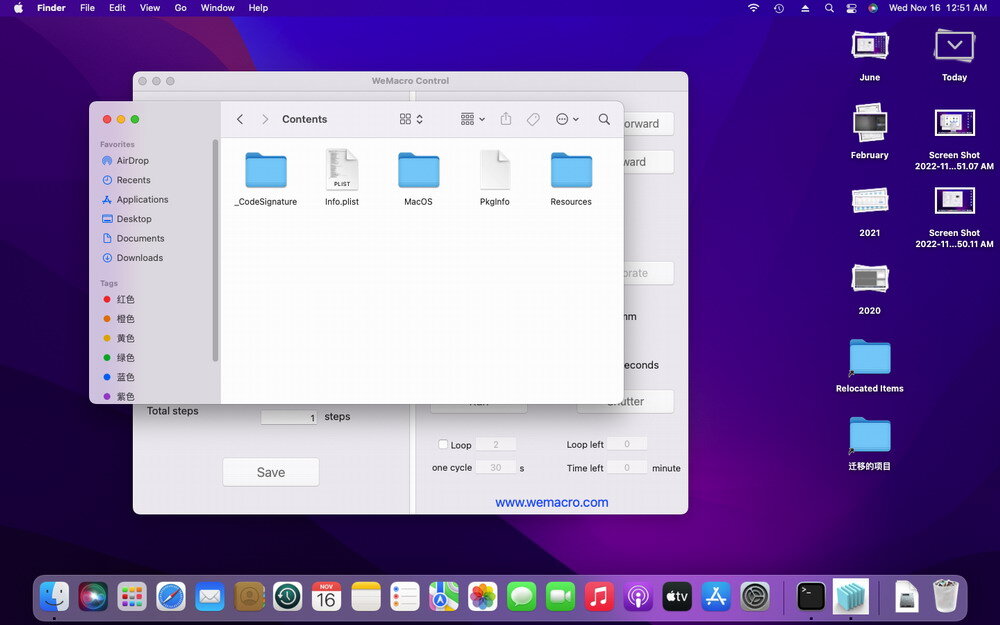
You will see the following, select MacOS and double click “MacOS”
You will then see an icon with the name WeMacro. Double click on it to open a second WeMacro application.
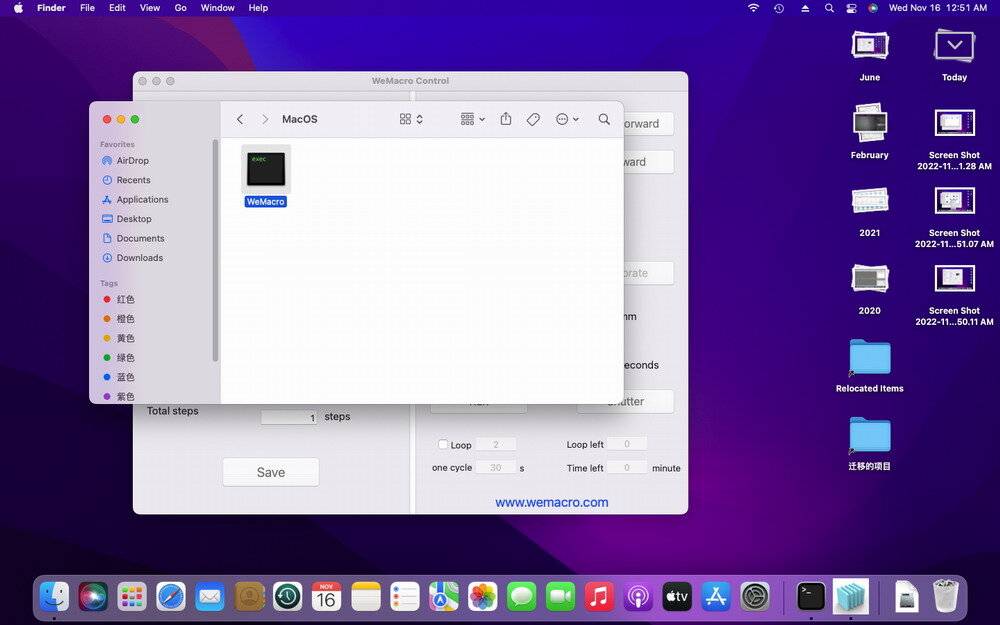
A terminal window will also be displayed, please do not close the terminal window.
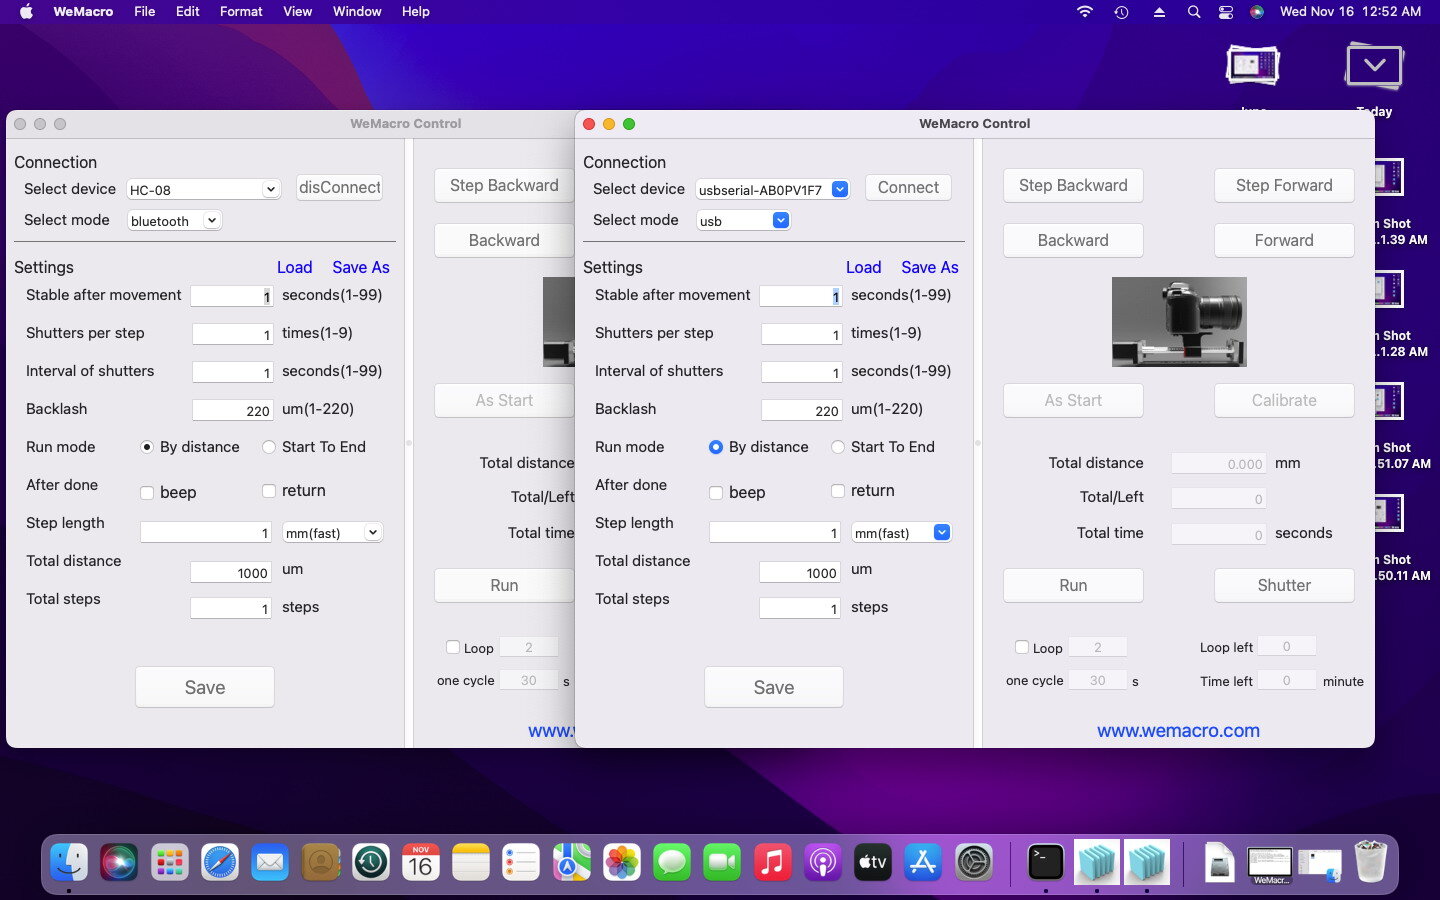
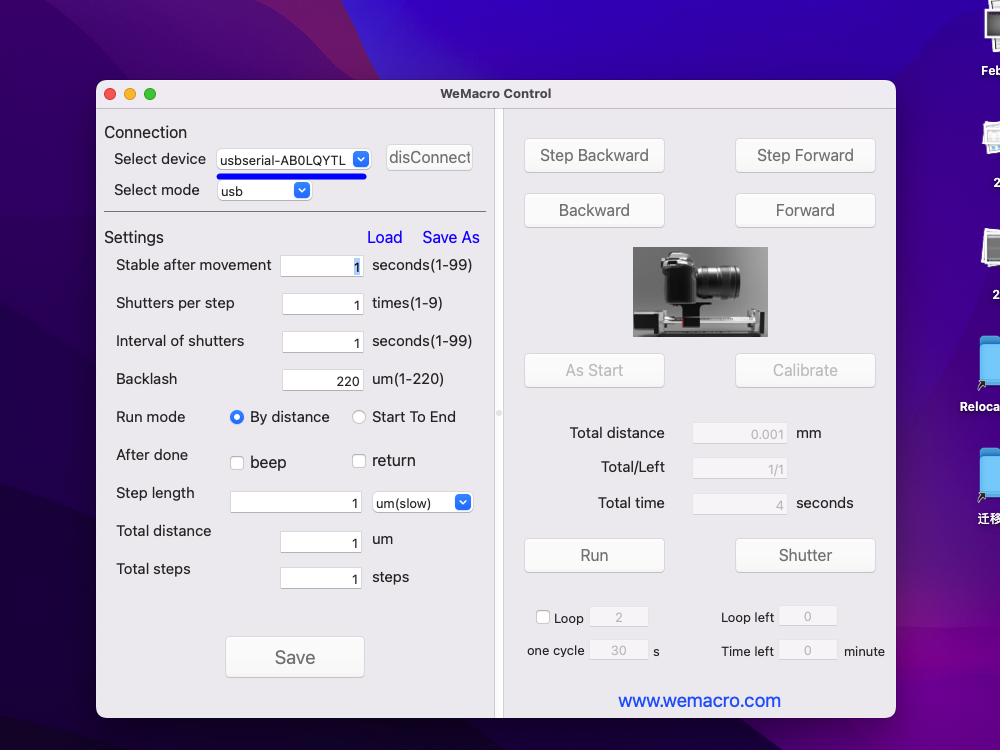
In the second WeMacro application that opens, select the USB connection, select the device, click on Connect and then click on “Save” to complete the connection of the second device.
How to install driver on MacOS later than 10.15 if need
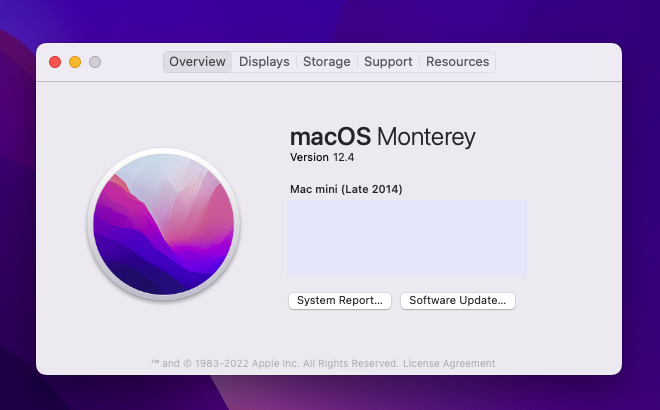
In most cases, MacOS has integrated chip driver, no need to install it separately.This article takes MacOS12.4 as an example to demonstrate how to install the driver. This method is only used in some special cases. Please be careful not to install the D2XX helper driver under any circumstances.
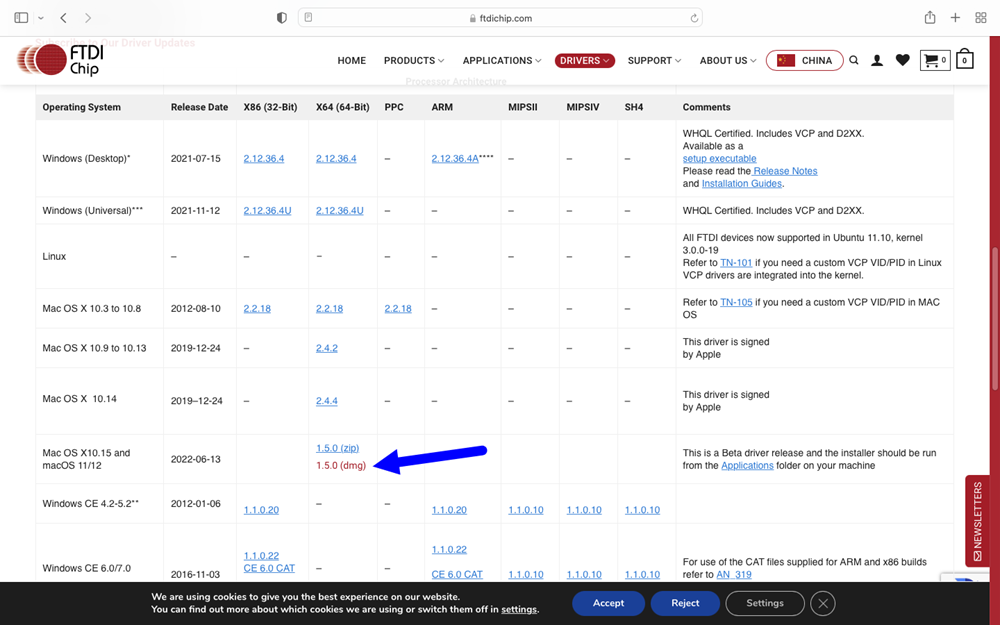
Please download the driver file indicated in the following figure from this webpage. (https://ftdichip.com/drivers/vcp-drivers/) 1.5.0 DMG file.
Double click the file you download and move this file to the application directory
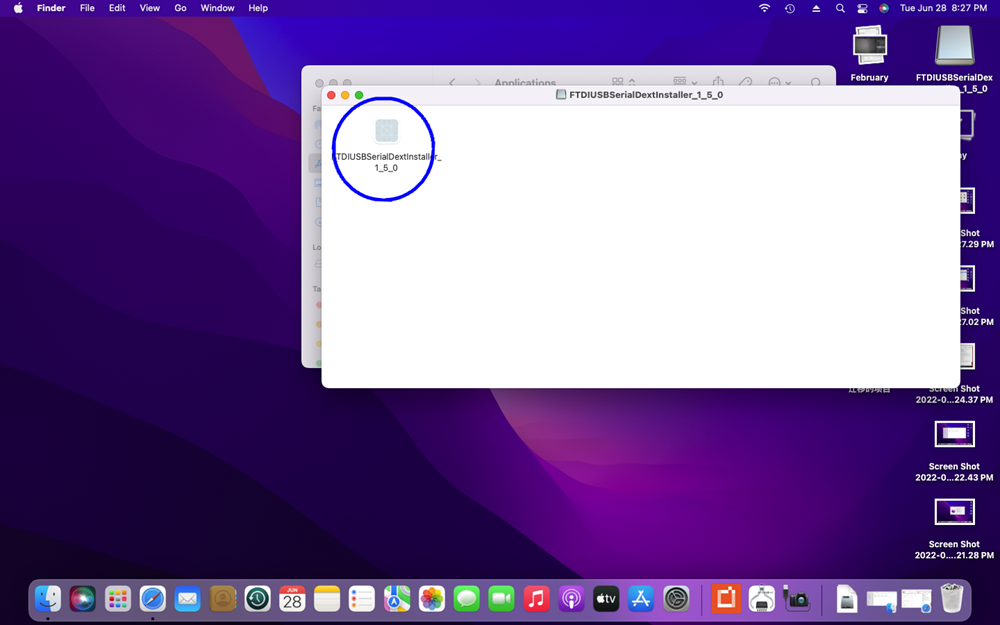
Drag this file to the application directory
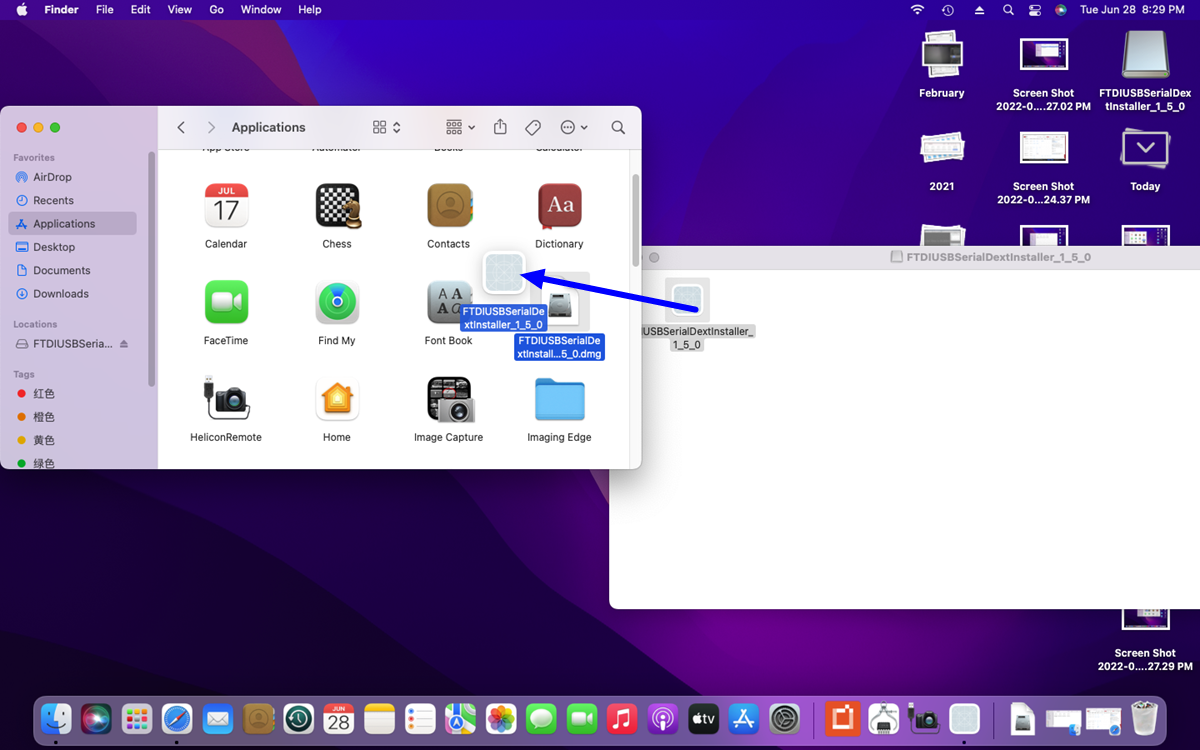
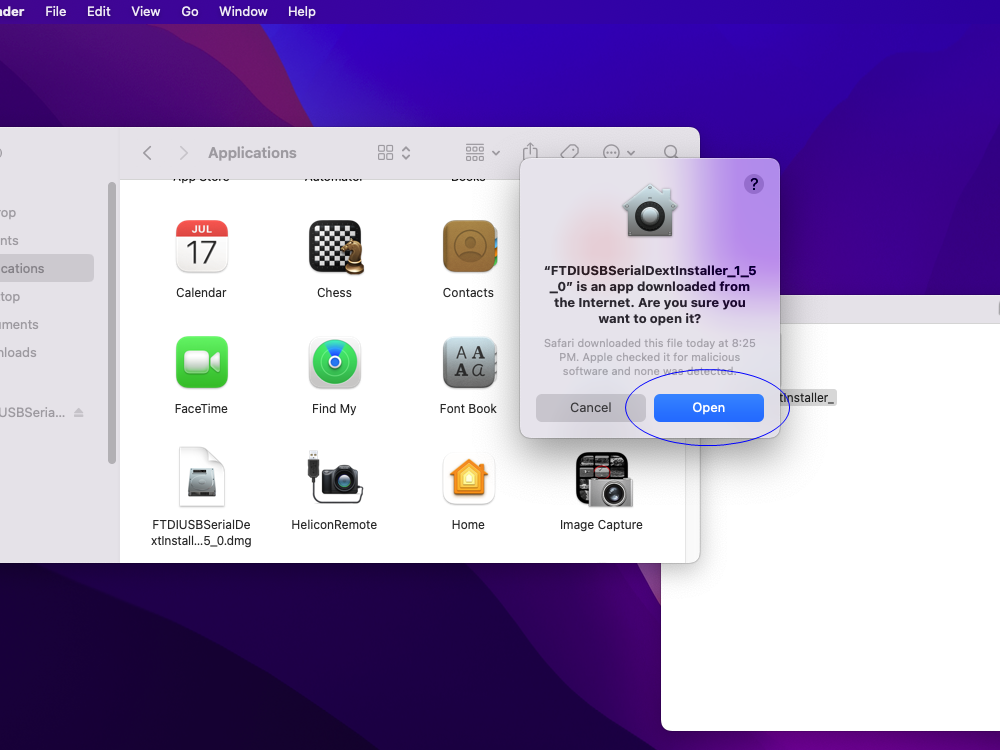
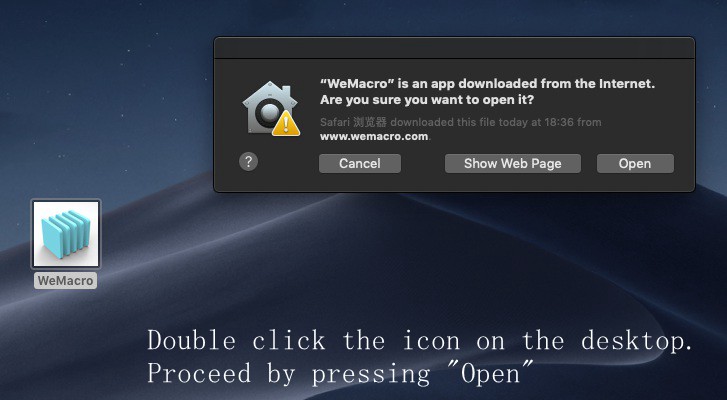
Doule click this file in application directory,you will get a popup prompt as below.Click “Open”
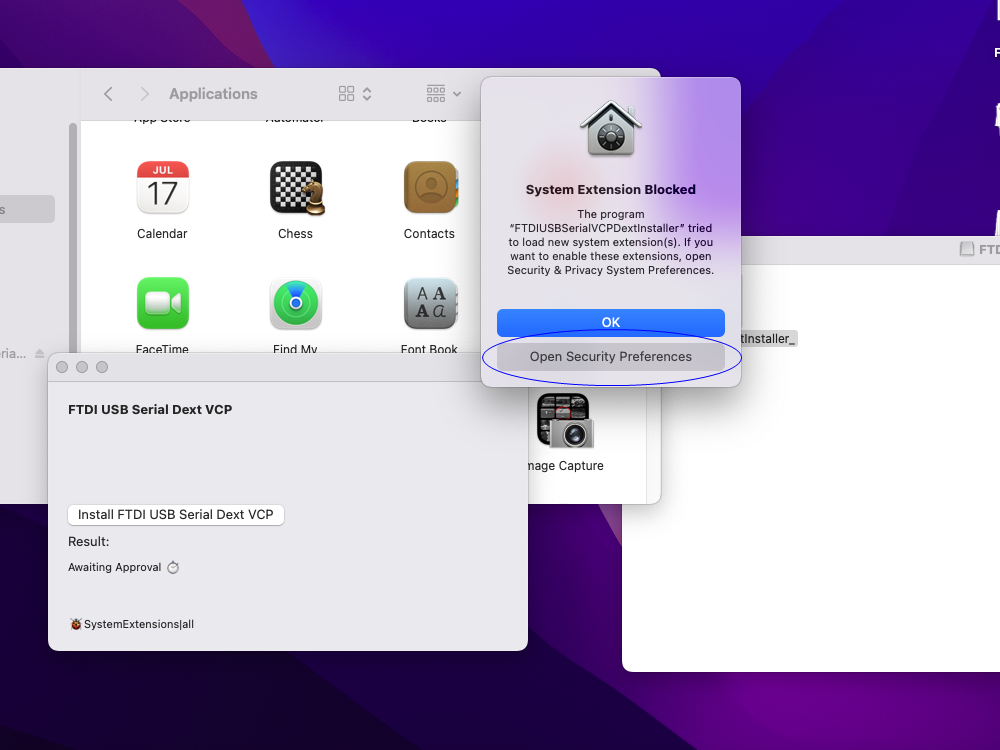
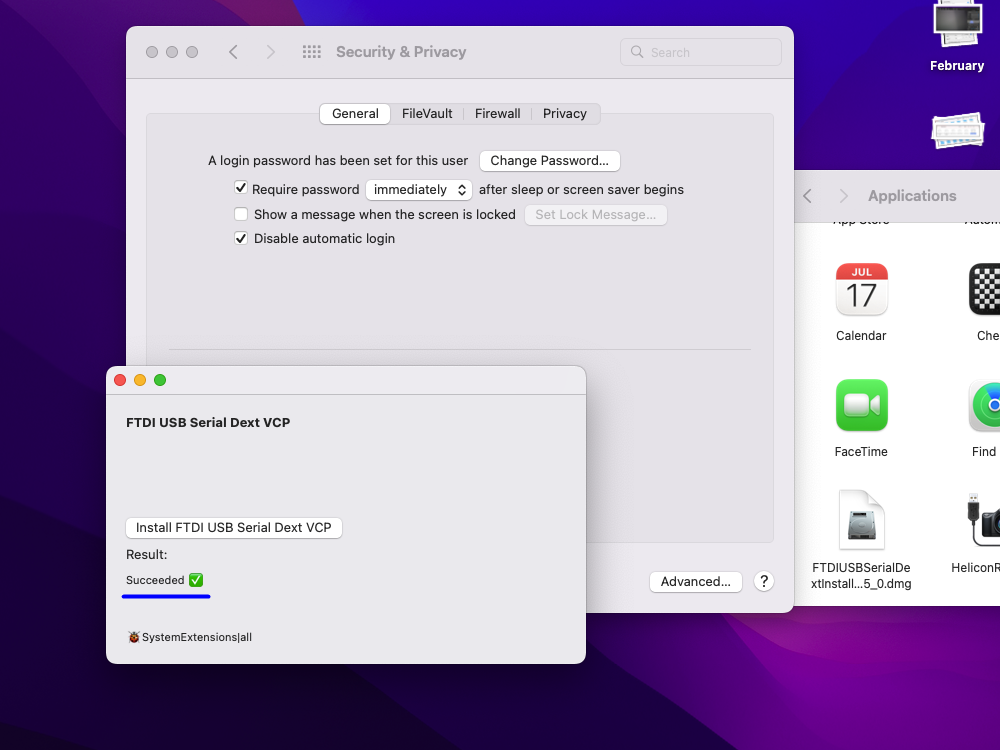
After you click “Open”, the following interface will appear, click “Install” and then click “Open security Preference”
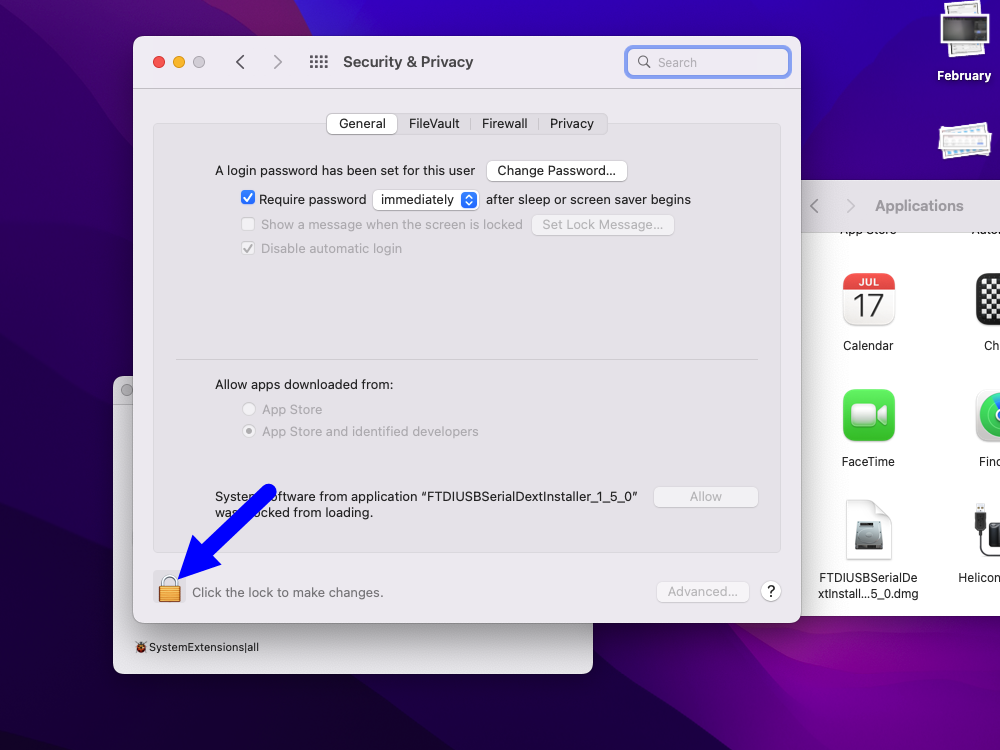
Click the lock button pointed by the arrow to unlock it.
Click “Allow” on this page after unlocking
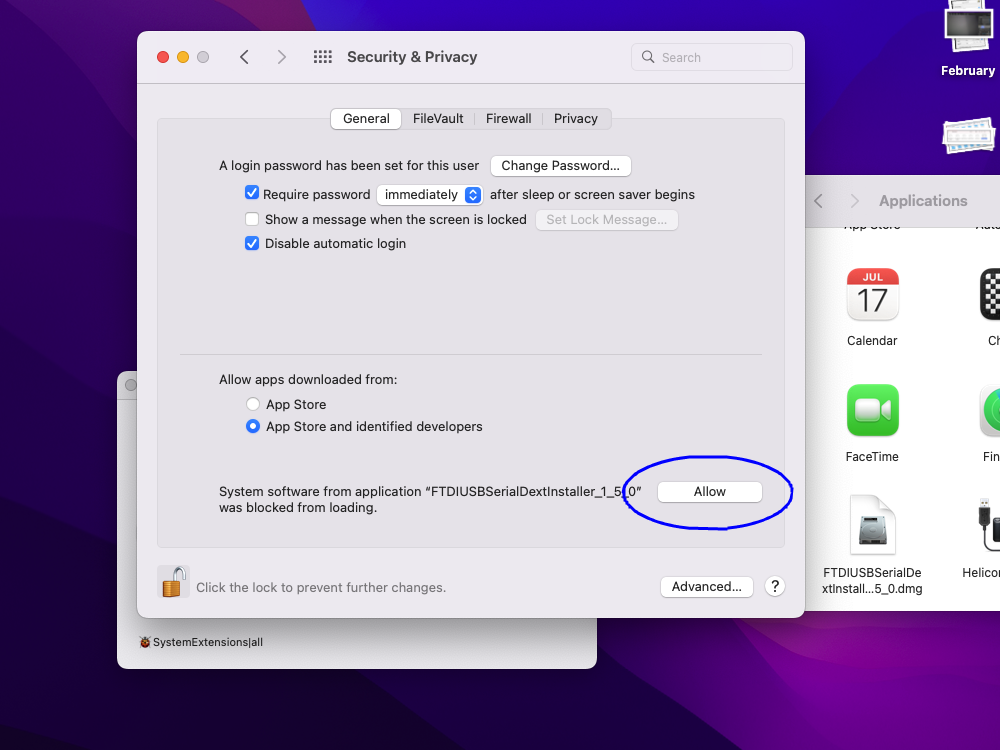
Next, it will show that the driver installation was successful.
If you have run the wemacro program before, exit first. After turning it on again, you will see the device in the drop down list
How to uninstall D2XX helper if installed
In some versions of Helicon Remote, a dialog box will pop up asking for the D2XXhelper driver to be installed.But this information is misleading for the WeMacro control box. If this driver is installed it will cause the Helicon Remote and WeMacro macOS programs to fail to recognise the control box.
Here’s how to uninstall D2XXhelper
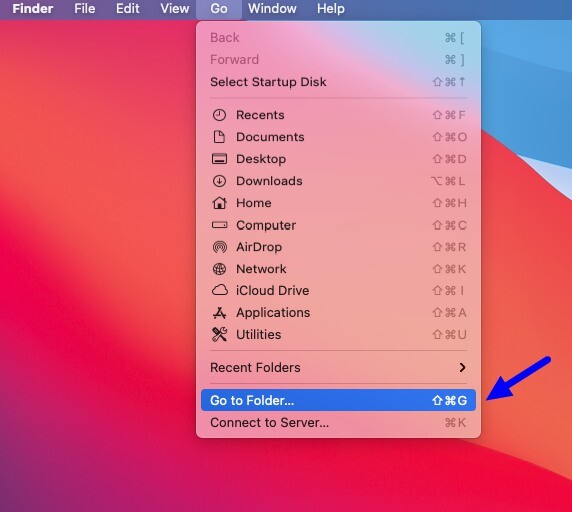
First,please use go to folder function
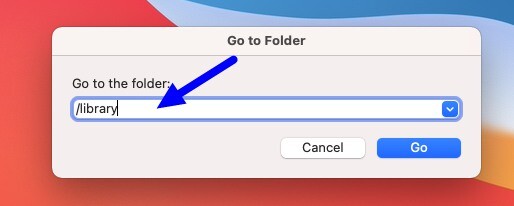
Then enter /library
Find the extensions folder in library
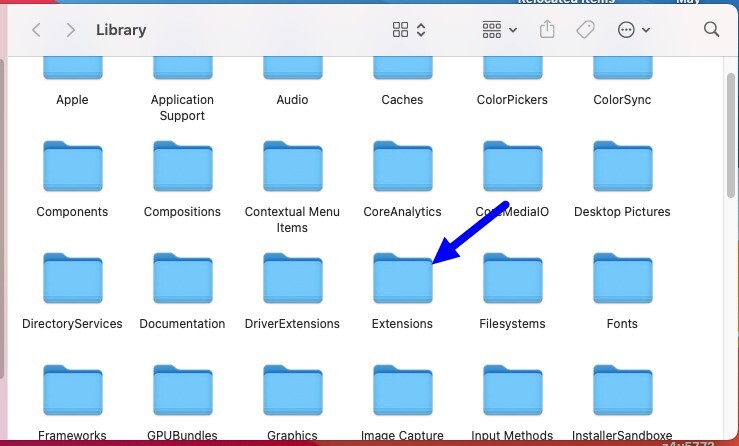
Go to the extensions directory, find the D2XXhelper file and drag this file to the trash.

At this point, the HeliconRemote or WeMacro program should be able to recognize the control box when opened again.
If it is still not recognized, try installing this driver file,link
Detail installation step on MacOS
Video for WeMacro USB control on MacOS
Please do not install D2XX driver even the Helicon Remote Mac version pop up the notification window.Just leave it alone.
How to remove D2XXhelper if installed
About Driver for MacOS
The current recent versions of MacOS generally do not require additional driver installation and can recognize the device directly after installing the WeMacro control program.
If the device is not found in the drop-down list of devices in the WeMacro application, please install the driver.
For MacOS X 10.9 and above,please download and install
(https://www.ftdichip.com/Drivers/VCP.htm) Select based on your system version
Restart to finish the installation of driver.
If the MacOS is 10.13 and later version,please follow the steps on the page
How to install driver on MacOS later than 10.15 if need.
Then we start to install the control program
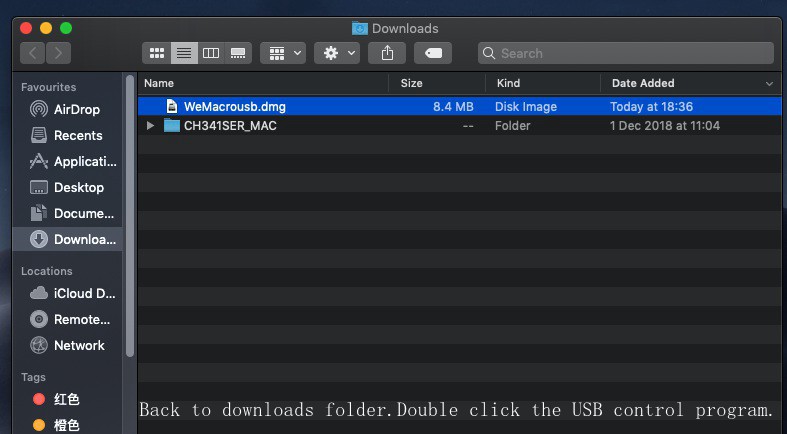
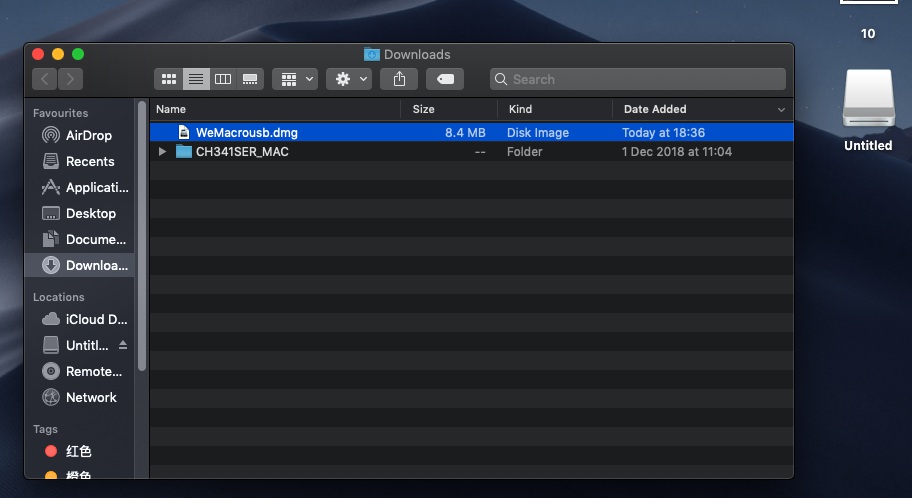
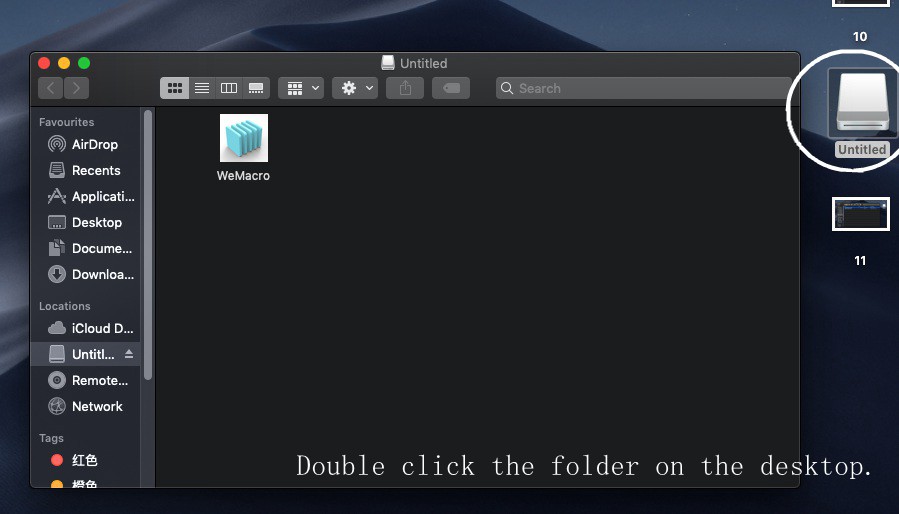
Double click the DMG file ,there will be a folder on the desktop“Untitled”

Please notice that if you drag the icon of WeMacro on the desktop to trash,it will not be in the folder of untitled.Please download it again.
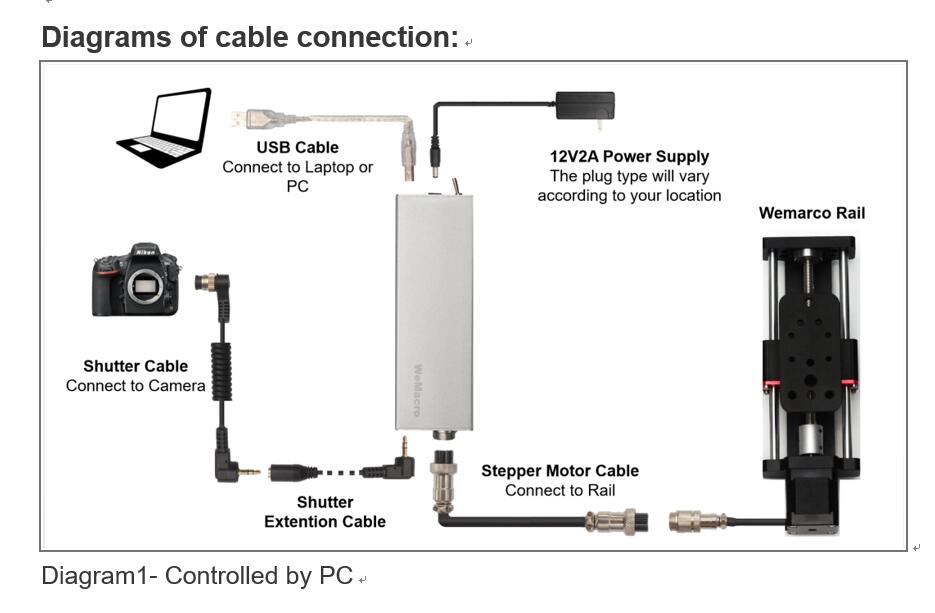
Before double click the icon of WeMacro,please make sure the controller had been turned on and connect as below
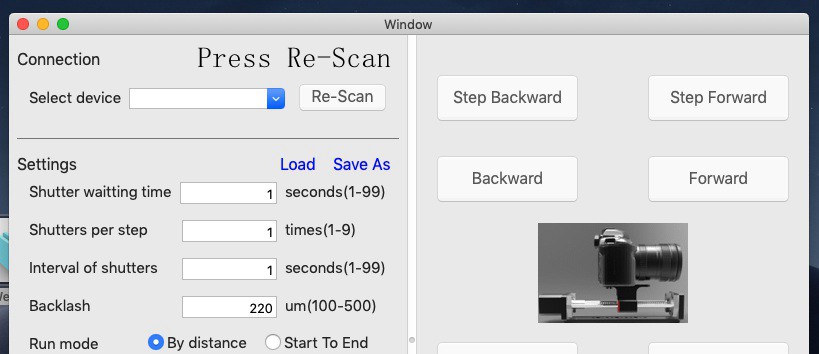
Then double click the icon of WeMacro it will show as below.Press Re-scan
The installation is complete.Please press “Shutter” to test if you hear the click sound come out from the controller.
How to change the driver for CH340 on Mac
In some Mac OS, the original driver from factory might not work well. In that case, please inform us your detail MacOS version. We will send you proper driver. Please contact us :William@wemacro.com
After receiving the driver from us, please follow steps by steps as below.
1,Remove the original driver.
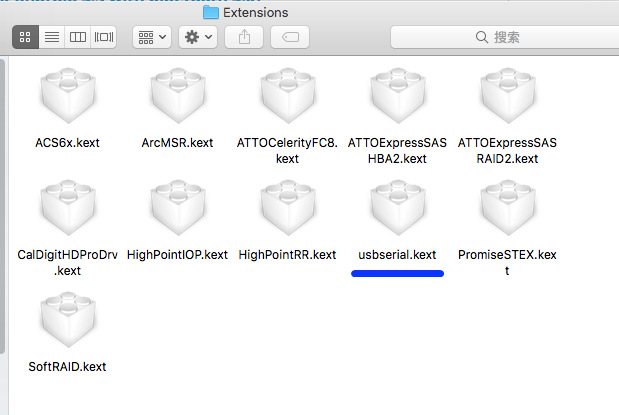
Please press “command + shift + G”, Type “/Library/Extensions/”, go to the Extensions folder.
It this folder you will find “usbserial.kext” if you had installed the original driver from chip factory. Select this kext and move it to trash.
2,Install the driver we send to you. Meanwhile, please make sure you are using the latest version of WeMacro Mac software. Restart the Mac after installation of driver. If you are using Helicon Remote, please also make sure it’s at least 3.9.7.
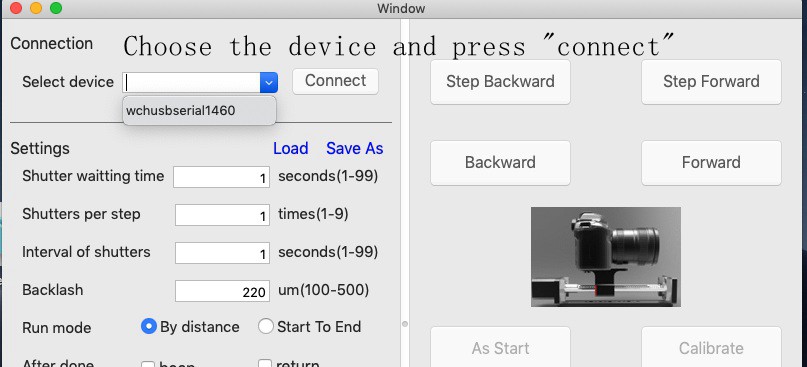
Select the device list in wemacro control program,press “connect”,(please notice only press connect button once.)Press “Save”. It will show “save done”. Then it will work.
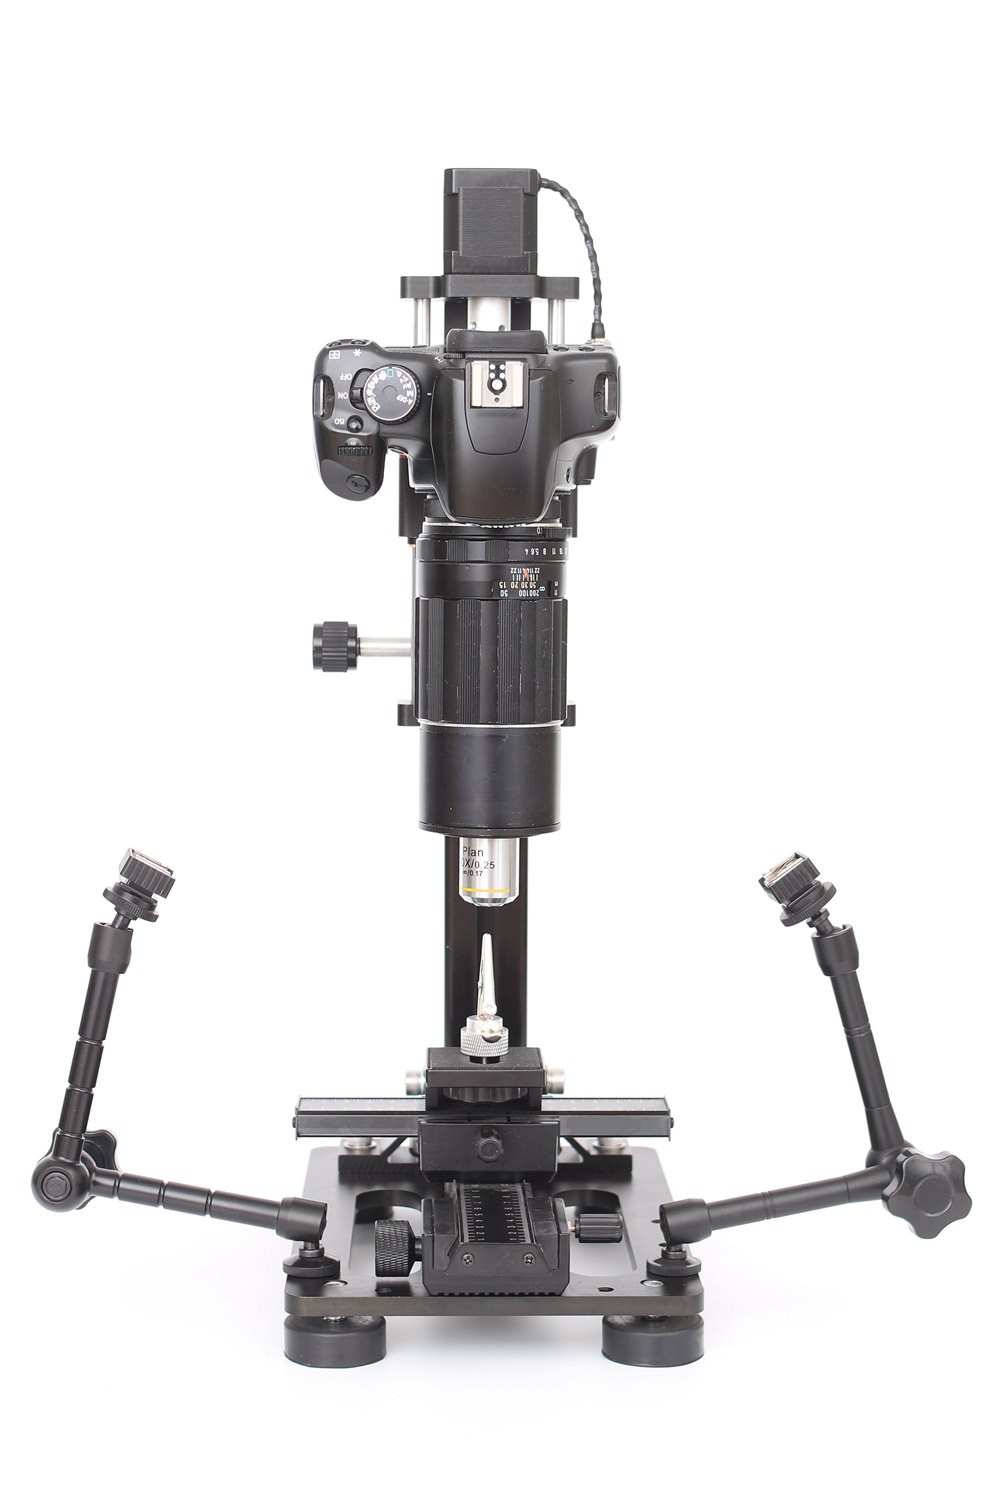
Setup the vertical stand
Re-filmed based on the 2025 version of the hardware, with detailed step-by-step assembly instructions that do not skip a single screw.
Some suggestions
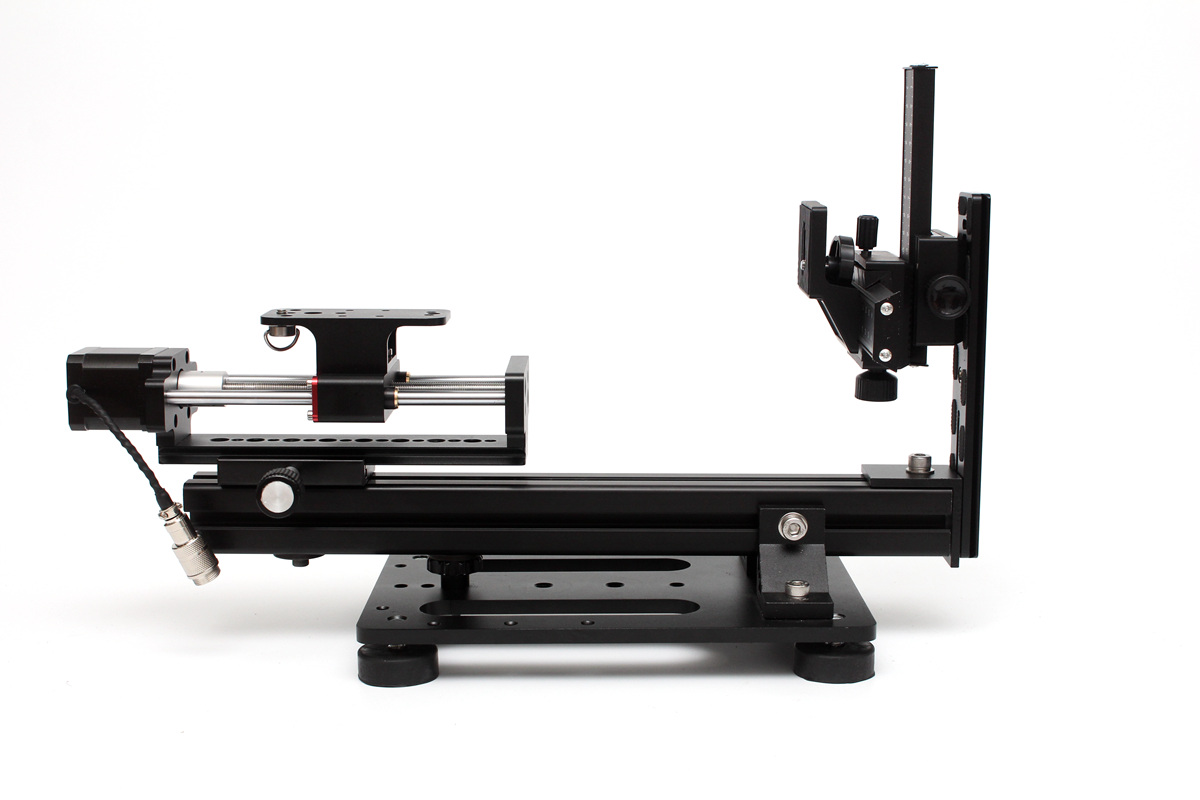
1 How to fix the WeMacro rail.
Please consider our Vertical stand which can save space on the desk and can also work in horizontal position.
2 What ‘s the difference about 2 mode
It’s my personal opinion that.Below 5X or 5X magnification,you can use from start to end mode.It’s quite intuitive.But if shoot in bigger magnification,it will be better working in distance mode.Such as 20X for butterfly wing scales.You can move the rail forward to get close to the beginning point.Then set a distance to run.At the end of shooting,if you are not sure whether the distance is enough for the whole range,and you do not know what the last picture status is,you can simply press “shutter” to shoot one more picture to check.Also it’s better changing parameters on the camera by cable or wireless instead of operating on the camera.
3 When I should use lens support
The are two methods to support lens.Nylon blot and ring support. These work when you shoot in continuous light.They can help to reduce the shake caused by the mirror.By using this method,you can reduce 3-5 seconds to stable the picture.It can save a lot of time when a stack contain over 100 pictures.
Useful weblink
By Johan J Ingles-Le Nobel .It’s very useful website for macro photography professionals or amateurs.And thanks to Johan,he reviewed our rail as well.
http://extreme-macro.co.uk/wemacro-rail/
(The software will be upgraded soon in these weeks.Auto mode will be add in control soon).
2,http://www.microscopyu.com/articles/formulas/formulasfielddepth.html
DOF about some Nikon objective lens.You can set step length smaller than DOF of objective lens.
3,https://expertphotography.com/20-tips-shallow-depth-of-field/
What Is Shallow Depth of Field(by Jenn Mishra from expertphotography.com)
Control by iOS/Android phones
We strongly recommend to use iphone or android to control the rail,it ‘s easier and more intuitive.Android ‘s apk can be found in our download page and iOS app can be found in App store now.Please search”WeMacro”in app store.
The control box we are shipping now is only one type,bluetooth version.It can be controlled by1, Windows PC though usb cable
2, Bluetooth 4.0 on phone(Android and iOS).
3, Bluetooth and USB on MacOS
Bluetooth control
(almost same,but it show clearly how the rail work) It almost same in iOS app.Search “WeMacro”in app store you will find it.
iOS device at least ipad 3 or iphone 4S which has bluetooth 4.0.
The difference is in iOS app ,the parameters save end with ***.wm. No limits of lens of parameters number.It can not be deleted once you make a **.wm file in iOS folder, but it can be changed.
Bluetooth version connection:Stay close to the control box within 2 meters.Open the app in the phone then wait about 5 seconds,the app will show “Remote device connected”.If the app do not show this message,you can slide to second page then slide back to first page of app.Wait about 5 seconds the message should appear.Before open the app,please make sure you are not running this app in background already. (Sometimes you need restart Bluetooth function on phone if it can’t connect first time.Detail process as below:
1, Disable the bluetooth on the phone, then restart it. Quit wemacro program in background (Please be sure you had installed the bluetooth version of apk).
2, Turn on the control box. Then turn on the app on the phone. Stay close with the control box within 1 meter.
Wait for about 5 seconds it will show device was connected. If does not, slide to next page of app then silde back to the first page and wait for few seconds. It will connect to the control box again.
)
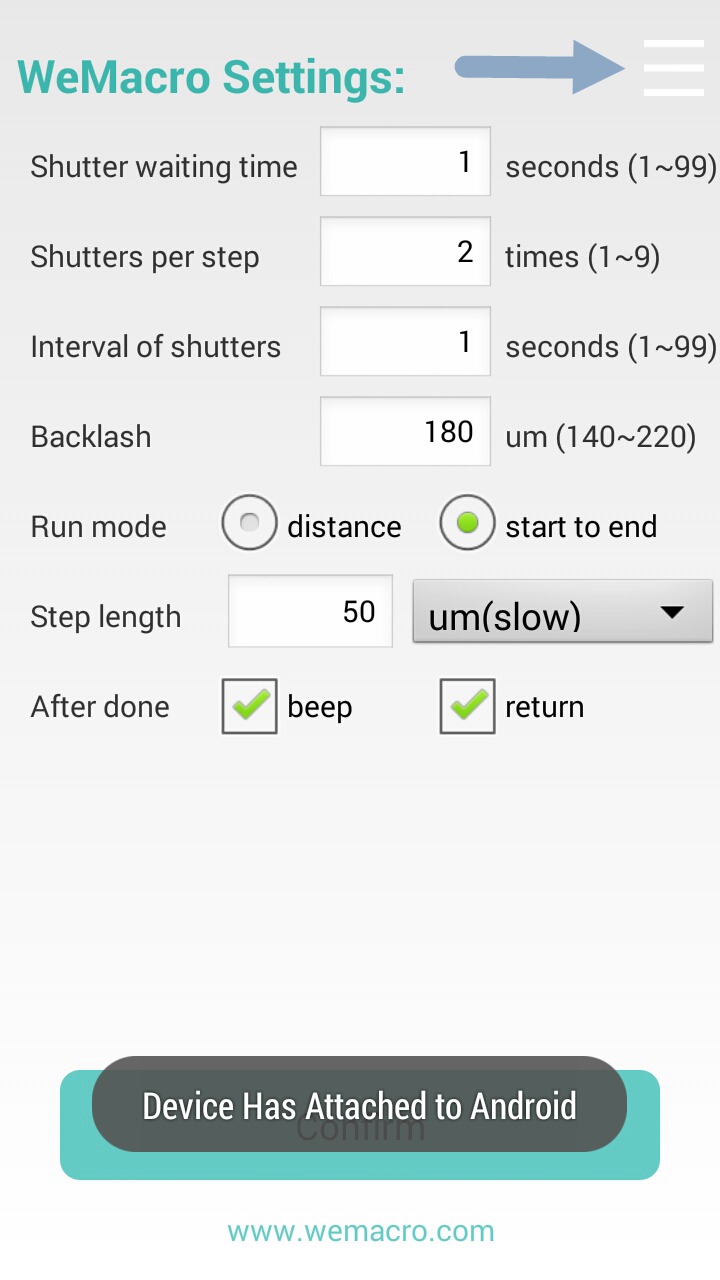 You can press the area where the arrow point at.To load or save settings in your phone’s SD card. As below:
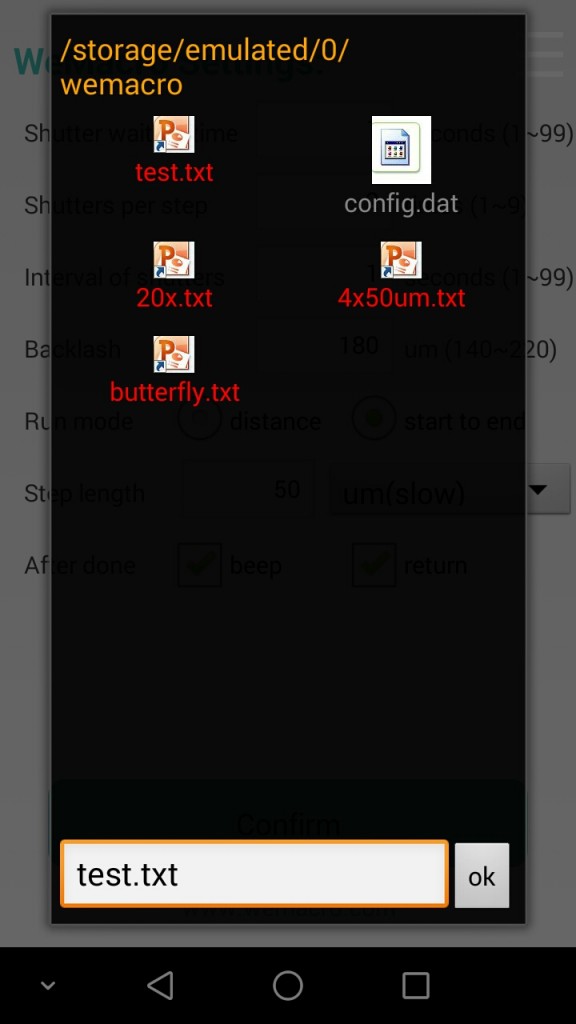
 You can save or load setting in WeMacro‘s directory.
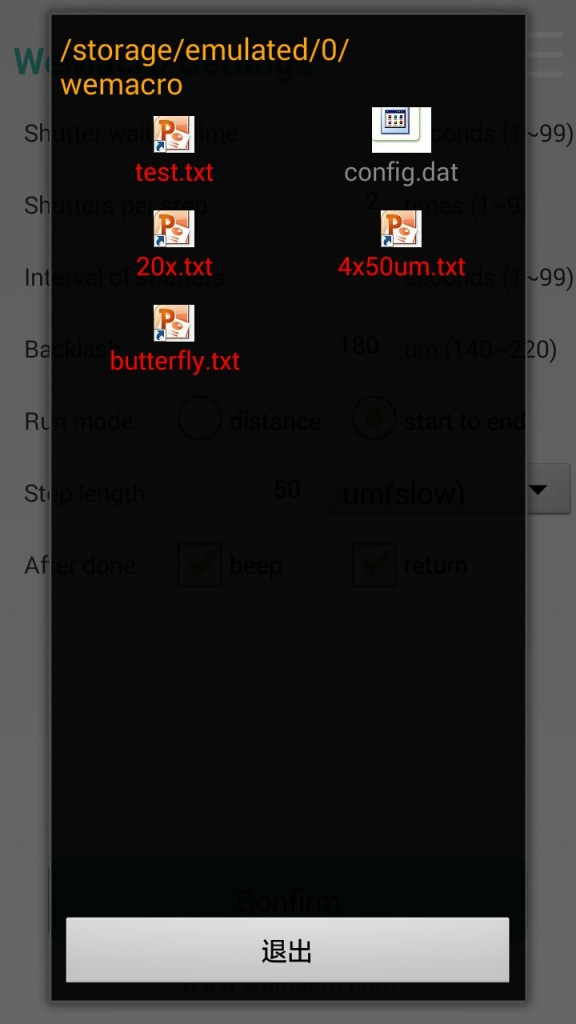
The setting file should name as ABC.txt.
You can set backlash for compensation in this apk now.The value is around 180 micron for new rail.
We offer 2 mode in this APK
1 distance mode :Means you can input the total distance you want to move and single step length.The program will calculate how many steps it will take automatically.If you change single step length,the step number will change accordingly.
Press “confirm”to save setting to control box.
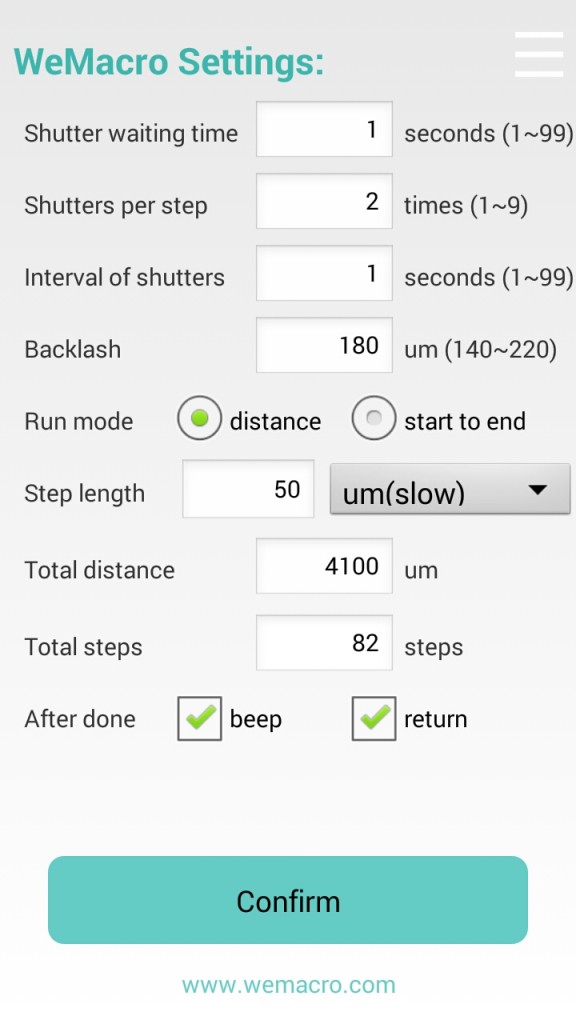
You can see steps number changed after typing new distance.
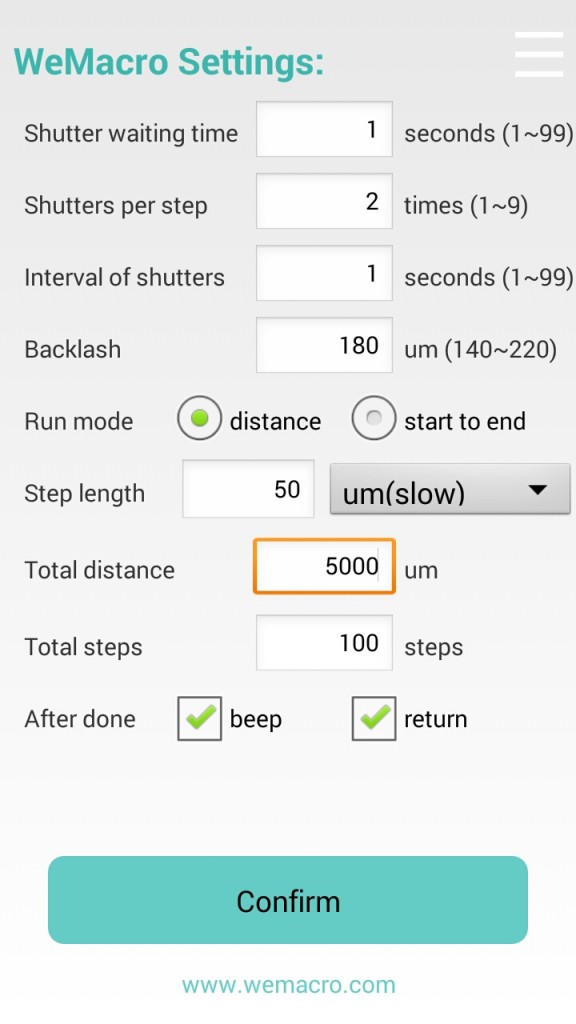
After pressing “confirm”,you can slide to next page.(1000um=1mm)
In second page,you can step forward,or go backward to adjust position.
If you tick off go back after running,you can press “calibrate”to compensate backlash after the rail stop.
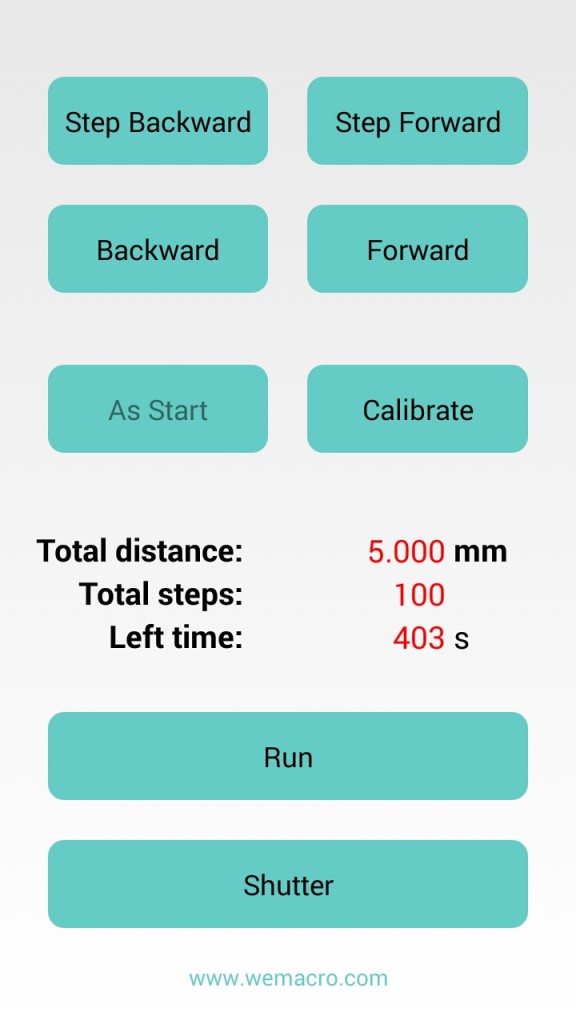
When the rail is running, the “run” button will show as “STOP”. If it be pressed, the rail will stop.
The ”stop” button need to be pressed to switch to ”run” when it finish running.
Mode: Start to End
Means you can set starting position and ending position,step length.The rail will run automatically.Press confirm after setting the first page.
In second page you can adjust the position to close to the starting point.If you feel too slow to adjust in micron mode,you can return to first page,swtich to mm mode.But please remember to change back before fine adjustment.To get better accuracy,if you press backward or stepbackward in adjusting positon,please make forward or stepforward,length should be longer than 180um,about 1/4 rotation.So we suggest slowly go forward or step forward to approach the starting point.You view it on camera’s LCD or by using EOS utility,helicon remote or nikon camera control pro on PC.But remember to turn off live view on camera or PC software,before start shooting.
Press “As start”to set starting point.Then press step forward or forward to find the ending point.Forward direction only!
When the rail arrive ending point,please press “As end”the rail will go back to starting point you just set.Please remember to press “calibrate” before running.
How many steps and how long time it will take will be indicated on second page.
“Calibrate”button will be activated if you tick off return after done.It should be pressed before you rerun.
Meanwhile,if you need stop in running or run again,the usb cable or bluetooth should be keep connecting.
When the rail is running, the “run” button will show as “STOP”. If it be pressed, the rail will stop.
The ”stop” button need to be pressed to switch to ”run” when it finish running.
Notice:The shutter signal may not work if you are controlling the camera through a USB cable on PC by camera software such as Canon’s EOS utility or Nikon’s CameraControlPro.Turn off live view function in software can make trigger signal from control box works.Also set the camera at M mode and the lens is MF mode too.